Tiramisu Cups Recipe
Introduction
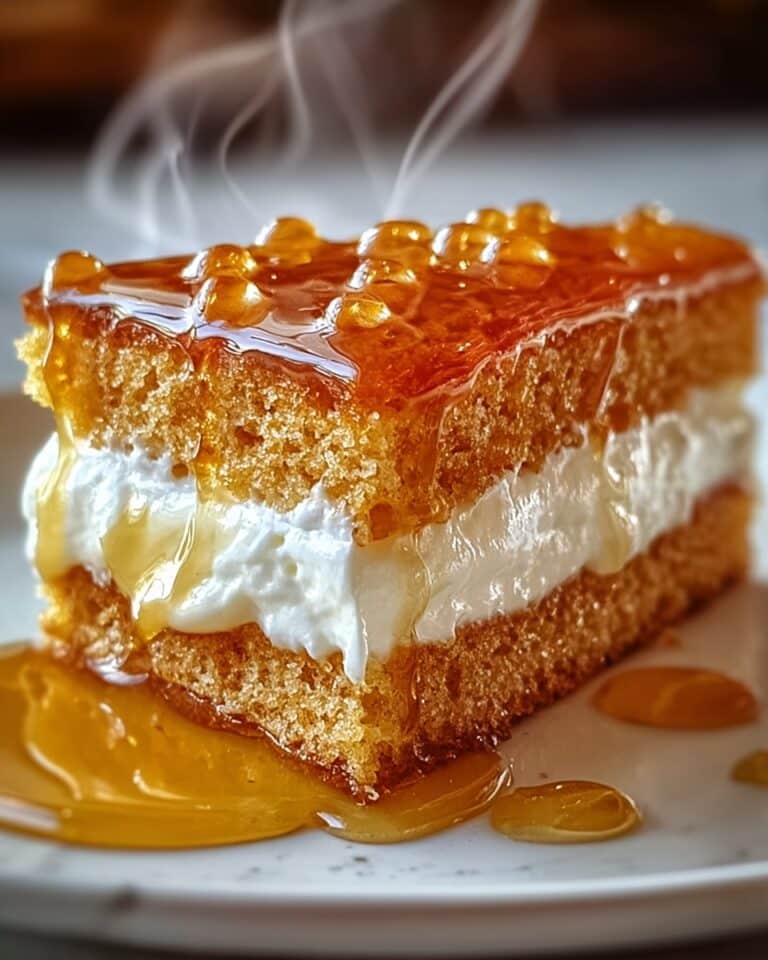
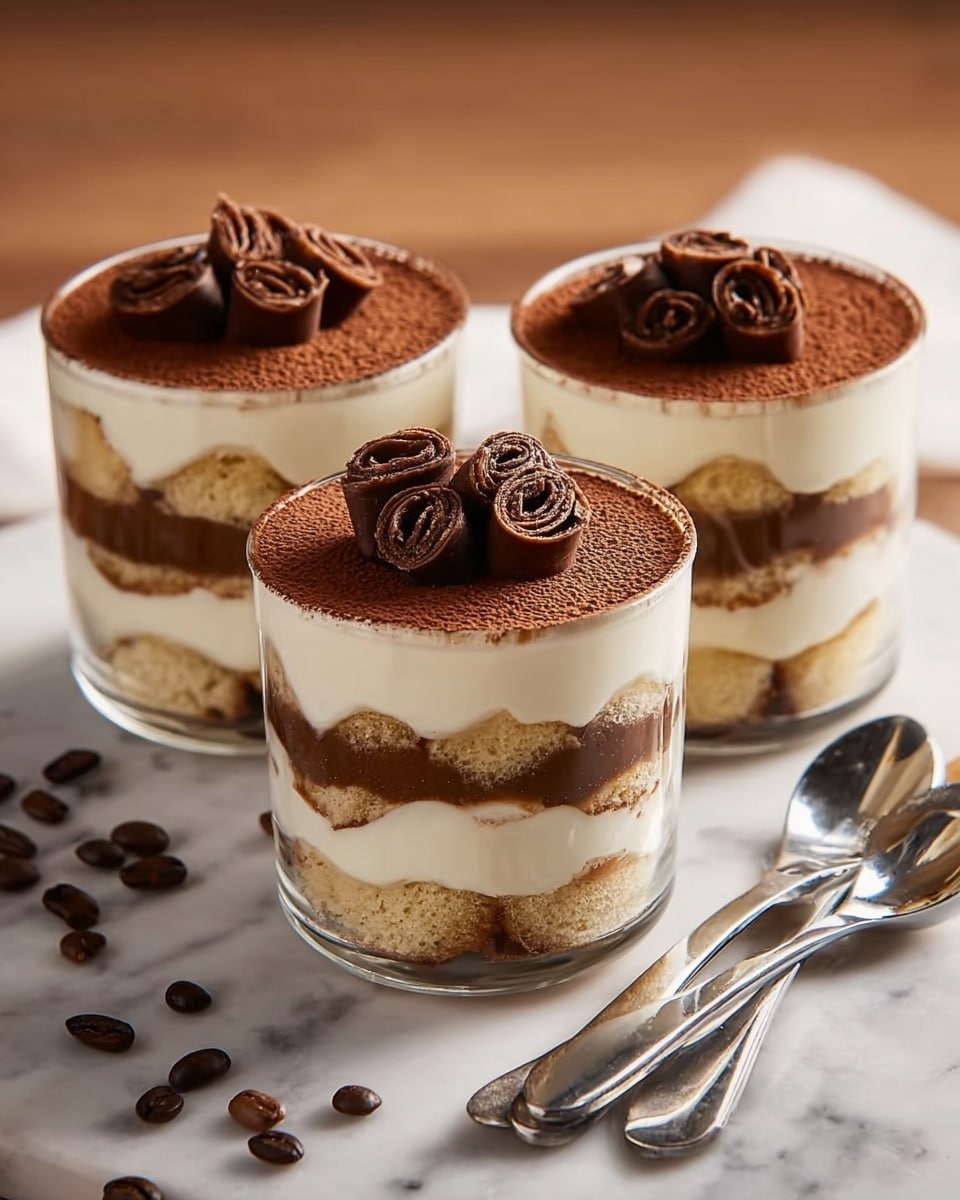
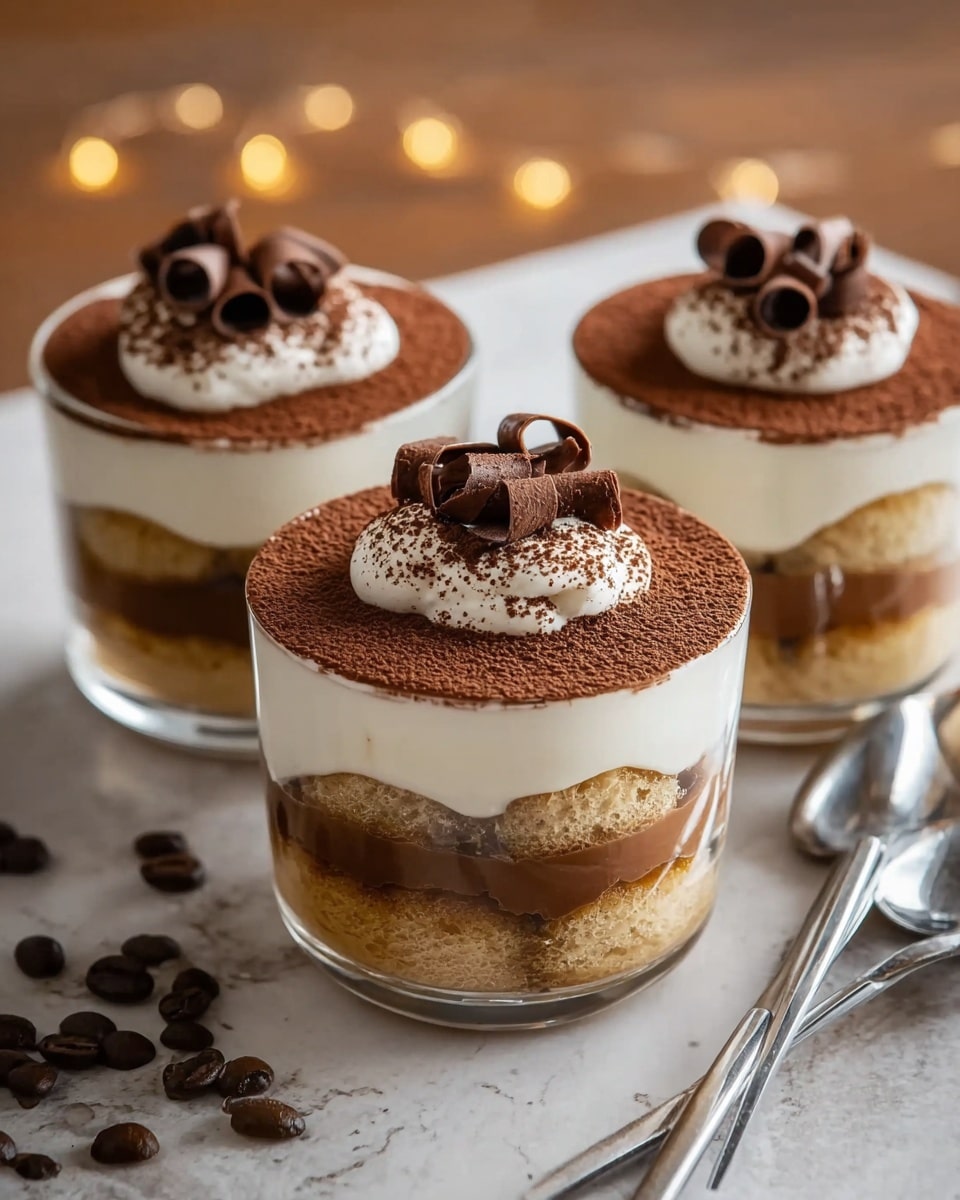
Tiramisu Cups offer a delightful twist on the classic Italian dessert, combining creamy mascarpone, coffee-soaked ladyfingers, and a dusting of cocoa powder in convenient individual servings. This no-bake treat is both elegant and simple to prepare, perfect for impressing guests or enjoying a special homemade dessert.
Ingredients
- 1 cup Mascarpone cheese
- 1 cup Heavy cream
- 1/2 cup Granulated sugar
- 1 cup Espresso or strong coffee
- 1 teaspoon Vanilla extract
- 24 pieces Ladyfinger cookies
- 2 tablespoons Cocoa powder
- 1/4 cup Milk
Instructions
- Step 1: Brew a strong cup of espresso or coffee and allow it to cool completely. Add vanilla extract and set aside.
- Step 2: In a mixing bowl, whip the heavy cream until soft peaks form to create a light and airy texture.
- Step 3: In another bowl, combine mascarpone cheese and granulated sugar. Mix until smooth and creamy.
- Step 4: Gently fold the whipped cream into the mascarpone mixture, taking care not to deflate the cream.
- Step 5: Quickly dip each ladyfinger cookie into the cooled coffee mixture. Avoid soaking them too long to keep their texture.
- Step 6: In serving cups, layer dipped ladyfingers followed by a layer of the mascarpone cream. Repeat the layers until the cups are filled.
- Step 7: Cover the cups and refrigerate for at least 4 hours, or preferably overnight, to allow the flavors to meld.
- Step 8: Before serving, dust the top of each cup with cocoa powder for a classic tiramisu finish.
Tips & Variations
- For a boozy twist, add a splash of coffee liqueur to the coffee before dipping the ladyfingers.
- Use decaffeinated coffee if serving to children or those avoiding caffeine.
- Try layering fresh berries between the mascarpone layers for a fruity variation.
Storage
Store tiramisu cups covered in the refrigerator for up to 3 days. For best texture, consume within this time frame. If reheating, it’s best enjoyed chilled—avoid warming as it alters the creamy consistency.
How to Serve
Serve this delicious recipe with your favorite sides.
FAQs
Can I make tiramisu cups ahead of time?
Yes, making them ahead is encouraged. Refrigerate for at least 4 hours or overnight to allow the flavors to fully develop and the texture to set perfectly.
What if I can’t find ladyfinger cookies?
You can substitute with sponge cake or pound cake slices, although ladyfingers provide the traditional texture and are preferred for authenticity.
PrintTiramisu Cups Recipe

Tiramisu Cups are a delightful and elegant no-bake dessert featuring layers of creamy mascarpone, whipped cream, coffee-soaked ladyfingers, and a dusting of rich cocoa powder. This recipe delivers the classic flavors of traditional tiramisu in convenient individual servings, perfect for parties or a decadent treat at home.
- Prep Time: 20 minutes
- Cook Time: 0 minutes
- Total Time: 4 hours 20 minutes (including chilling time)
- Yield: 4 to 6 individual cups 1x
- Category: Dessert
- Method: No-Cook
- Cuisine: Italian
- Diet: Vegetarian
Ingredients
Base Ingredients
- 1 cup Mascarpone cheese – A creamy base that gives tiramisu its rich texture.
- 1 cup Heavy cream – Adds lightness and volume to the dessert.
- 1/2 cup Granulated sugar – Sweetens the mixture to balance the flavors.
Coffee Ingredients
- 1 cup Espresso or strong coffee – Provides the classic coffee flavor; use decaf if preferred.
- 1 teaspoon Vanilla extract – Enhances the overall flavor profile with warmth.
Layering Ingredients
- 24 pieces Ladyfinger cookies – The essential component for layering; choose crisp ones for best results.
- 2 tablespoons Cocoa powder – For dusting on top; use unsweetened for a rich finish.
- 1/4 cup Milk – Can be used to soak the ladyfingers for added moisture.
Instructions
- Gather Ingredients: Collect all your ingredients including mascarpone cheese, heavy cream, sugar, coffee, vanilla extract, cocoa powder, and ladyfinger cookies to ensure a smooth preparation process.
- Brew Coffee: Brew a strong cup of espresso or coffee and allow it to cool completely. Decaffeinated coffee can be used as an alternative if preferred.
- Whip Cream: In a mixing bowl, whip the heavy cream until soft peaks form, creating a light and airy texture essential for the tiramisu layers.
- Mix Mascarpone and Sugar: In a separate bowl, combine the mascarpone cheese with granulated sugar and vanilla extract, mixing until the mixture becomes smooth and creamy.
- Fold Whipped Cream: Gently fold the whipped cream into the mascarpone mixture, taking care not to deflate the whipped cream, to maintain the desired light texture.
- Dip Ladyfingers: Quickly dip each ladyfinger into the cooled coffee mixture (optionally mixed with milk for added moisture), ensuring they are soaked lightly but not soggy.
- Layer Cups: Begin assembling the tiramisu cups by placing a layer of coffee-dipped ladyfingers at the bottom, then add a layer of the mascarpone-cream mixture. Repeat the layering until the cups are filled to the desired amount.
- Refrigerate: Cover the cups with plastic wrap or lids and refrigerate for at least 4 hours, preferably overnight, to allow the flavors to meld and the dessert to set.
- Dust with Cocoa: Just before serving, dust the tops of the tiramisu cups generously with unsweetened cocoa powder for a classic and elegant finish.
- Serve and Enjoy: Serve chilled with a spoon and enjoy this rich and creamy dessert either individually or shared with friends and family.
Notes
- Do not soak the ladyfingers for too long, as they will become soggy and lose their texture.
- For a stronger coffee flavor, you can brush the ladyfingers with coffee instead of dipping.
- Use fresh mascarpone cheese for the best creaminess and flavor.
- To make the dessert ahead, prepare the tiramisu cups the day before to enhance the flavors.
- Substitute heavy cream with coconut cream for a dairy-free variation, although this will change the flavor slightly.
- For an adult version, consider adding a splash of coffee liqueur or Marsala wine to the coffee mixture.
Keywords: tiramisu cups, easy tiramisu recipe, no-bake tiramisu, coffee dessert, mascarpone dessert, layered dessert