Perfect Dutch Oven Pumpkin Bread Recipe
Introduction
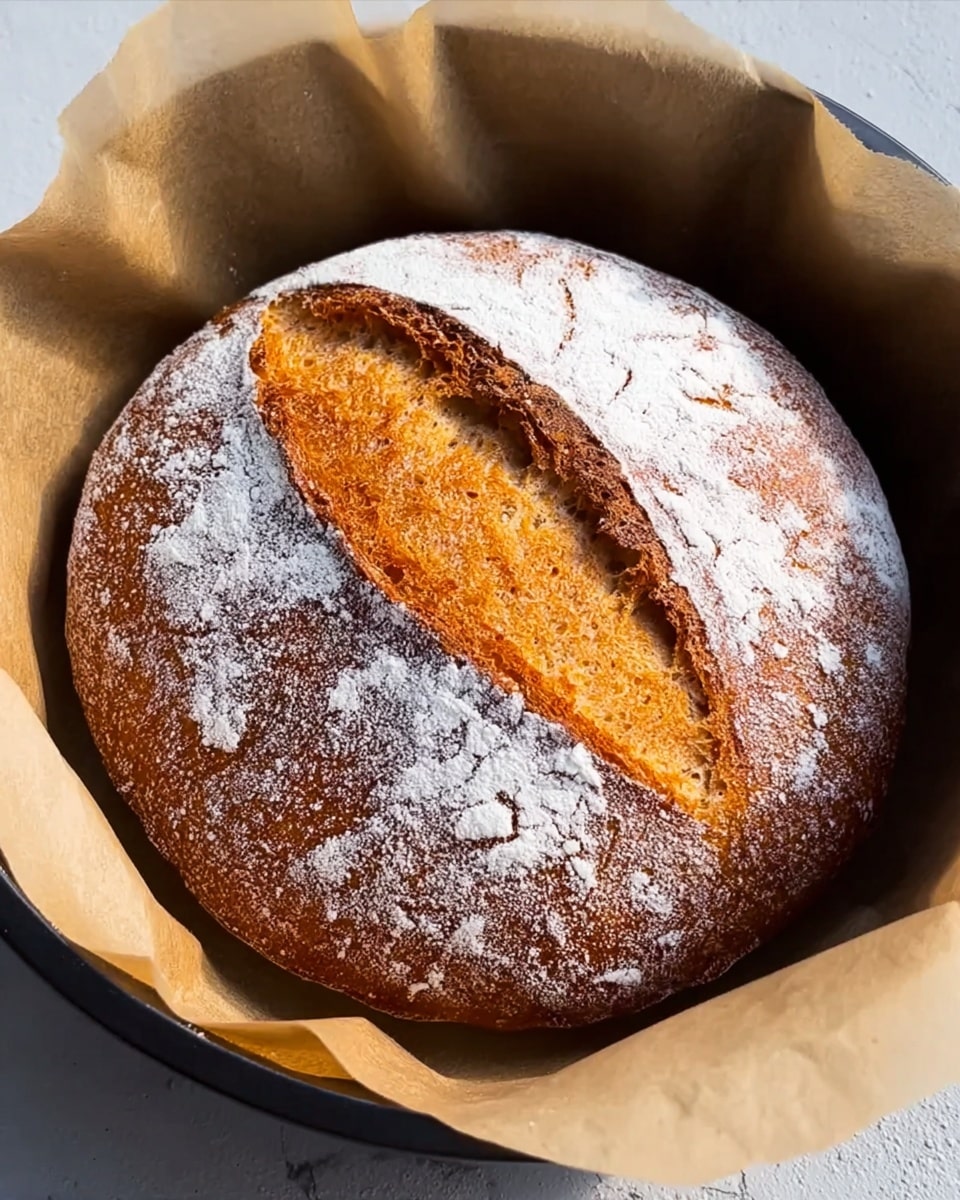
Enjoy the comforting flavors of autumn with this perfect Dutch oven pumpkin bread. It’s moist, tender, and crusty on the outside—ideal for breakfast or a cozy snack. This easy recipe uses simple ingredients and a slow rise for maximum flavor.
Ingredients
- 3/4 cup cool water (180 g)
- 1/2 tsp active dry yeast (use 1/4 tsp for overnight rise)
- 1 cup pumpkin puree (225 g)
- 3 cups bread flour (425 g)
- 2 tsp fine sea salt
Instructions
- Step 1: In a large bowl, pour in the cool water and sprinkle the active dry yeast on top. Whisk or stir gently to dissolve the yeast, then let it sit for a few minutes to activate. Add the pumpkin puree and whisk until the mixture is smooth and lump-free.
- Step 2: Add the bread flour and fine sea salt to the pumpkin-yeast mixture. Stir with a rubber spatula, then use your hands to squeeze and fold the sticky dough until fully combined. Cover with plastic wrap and let rest at room temperature for one hour.
- Step 3: Wet your fingers and perform several folds by lifting and folding the dough over itself until it tightens. Cover again and let rise until the dough increases in volume by about a third, 3-4 hours. Pop any large air bubbles for an even texture.
- Step 4: Transfer the bowl to the fridge to chill and rest for about 12 hours or overnight.
- Step 5: The next morning, gently turn the chilled dough onto a floured surface. Shape it into a tight, round ball by tucking edges underneath and smoothing with floured hands. Place on a parchment square, dust with flour, cover with a tea towel, and let rise 3-4 hours until puffy.
- Step 6: Preheat a 4-6 quart Dutch oven in your oven to 450°F (230°C). Let it heat inside for an additional 10-20 minutes once the temperature is reached. Meanwhile, score the top of the dough with a sharp paring knife about ½ cm deep.
- Step 7: Carefully remove the hot Dutch oven. Using the parchment paper, transfer the dough to the pot and cover with the lid. Bake for 20 minutes, then remove the lid and bake another 20-25 minutes until the crust is deep golden and firm to the touch.
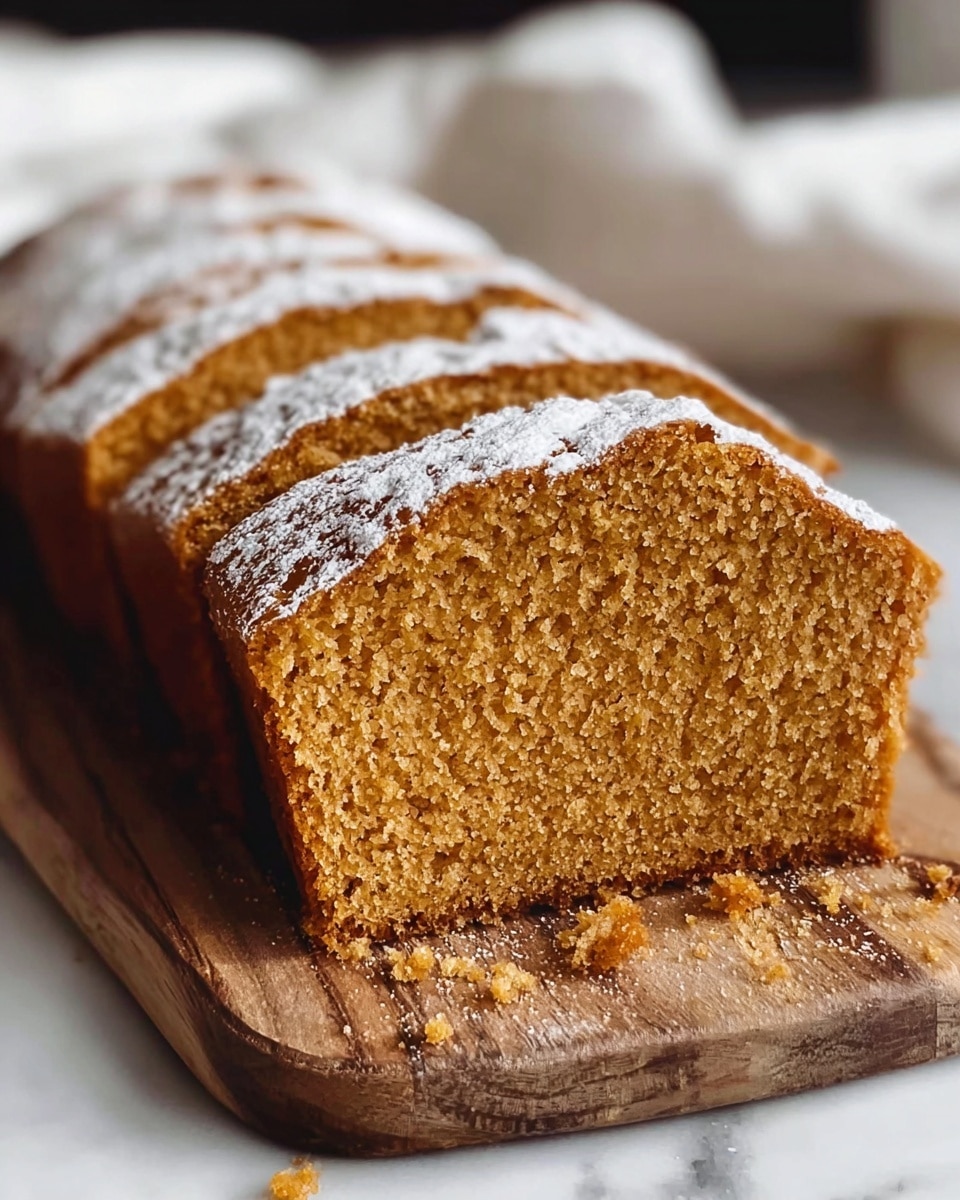
- Step 8: Remove the bread from the Dutch oven and cool on a rack for at least one hour before slicing to allow the crumb to set and flavors to develop.
Tips & Variations
- For a more pronounced pumpkin flavor, add 1/2 tsp cinnamon or pumpkin pie spice to the dry ingredients.
- Use bread flour for better gluten development and a chewier texture, but all-purpose flour can be substituted if needed.
- Try adding chopped nuts or dried fruit for extra texture and sweetness.
- If you want a quicker rise, use the full 1/2 tsp yeast and keep the dough in a warm spot for the rising steps.
Storage
Store cooled bread wrapped in a clean kitchen towel or in a paper bag at room temperature for up to 3 days. To keep longer, slice and freeze in an airtight bag for up to one month. Reheat slices in a toaster or oven to restore crustiness.
How to Serve
Serve this delicious recipe with your favorite sides.
FAQs
Can I use canned pumpkin puree?
Yes, canned pumpkin puree works perfectly in this recipe. Just be sure to use pure pumpkin and not pumpkin pie filling, which contains added spices and sugar.
What if I don’t have a Dutch oven?
You can bake this bread on a preheated baking stone or heavy baking sheet, and cover it with an inverted oven-safe bowl or metal pot to trap steam. This helps create a crusty exterior similar to a Dutch oven bake.
PrintPerfect Dutch Oven Pumpkin Bread Recipe
This Perfect Dutch Oven Pumpkin Bread recipe yields a moist, tender loaf with a beautifully crisp crust, effortlessly achieved using a preheated Dutch oven for an artisan-style finish. The pumpkin puree adds natural moisture and subtle sweetness, making this bread ideal for autumn or any time you crave a comforting homemade loaf with a hint of seasonal flavor.
- Prep Time: 30 minutes
- Cook Time: 45 minutes
- Total Time: 18 hours 15 minutes
- Yield: 1 loaf (about 10–12 slices) 1x
- Category: Bread
- Method: Baking
- Cuisine: American
Ingredients
Wet Ingredients
- 3/4 cup cool water (180 g)
- 1 cup pumpkin puree (225 g)
Dry Ingredients
- 1/2 tsp active dry yeast (use 1/4 tsp for overnight rise)
- 3 cups bread flour (425 g)
- 2 tsp fine sea salt
Instructions
- Activate the yeast: In a large bowl, pour in the cool water and sprinkle the active dry yeast on top. Whisk or stir gently to dissolve the yeast, then let it sit for a few minutes to activate.
- Combine pumpkin puree: Add the pumpkin puree to the yeast mixture and whisk until smooth and lump-free, ensuring an even orange liquid base.
- Mix dry ingredients: Add the bread flour and fine sea salt to the bowl. Stir with a rubber spatula as much as possible, then use your hands to squeeze and fold the sticky dough until all flour is absorbed and the mixture is even.
- First rise: Cover the bowl with plastic wrap and leave at room temperature for 1 hour.
- Dough folds and extended rise: After 1 hour, with wet fingers, fold the dough over itself several times until it resists folding, then cover and let it rise again at room temperature until the volume increases by about one third, about 3-4 hours. Pop any large air bubbles that appear.
- Refrigerate overnight: Transfer the dough bowl to the refrigerator and chill for about 12 hours or overnight for optimal flavor and texture development.
- Shape the dough: Remove the chilled dough and gently transfer it to a floured surface. Using floured hands, tuck the edges underneath and shape the dough into a tight, round ball. Place on a parchment paper square, dust the top lightly with flour, cover with a tea towel, and let rise again at room temperature for 3-4 hours until puffy.
- Preheat Dutch oven: Place a 4-6 quart Dutch oven in the oven and preheat at 450°F (230°C). Let it heat inside for an additional 10-20 minutes once the target temperature is reached to ensure thorough heating.
- Score the dough: Using a sharp paring knife, make a shallow slash about 1/2 cm deep on the top of the risen dough to help control expansion during baking.
- Bake covered: Carefully remove the Dutch oven from the oven, lift the dough using the parchment paper, and place it inside. Cover with the lid and bake on the center rack for 20 minutes.
- Bake uncovered: Remove the lid and continue baking for another 20-25 minutes until the crust is deeply golden and firm to the touch.
- Cool before slicing: Remove bread from the Dutch oven and cool on a wire rack for at least 1 hour before slicing to allow the crumb to set perfectly and flavors to develop fully.
Notes
- Use bread flour for the best texture and rise, but all-purpose flour can be substituted if needed.
- For a longer, slower fermentation, reduce yeast to 1/4 tsp and allow the initial rise overnight in the refrigerator.
- Make sure to score the dough just before baking to help control oven spring and achieve an attractive crust.
- Allow the bread to cool completely before slicing to prevent a gummy texture inside.
- Keep your hands and work surface well floured when shaping sticky dough to avoid sticking but do not incorporate excess flour into the dough.
Keywords: pumpkin bread, dutch oven bread, homemade bread, artisan bread, pumpkin puree bread, no-knead bread