No Bake Blackberry Tart Recipe
Introduction
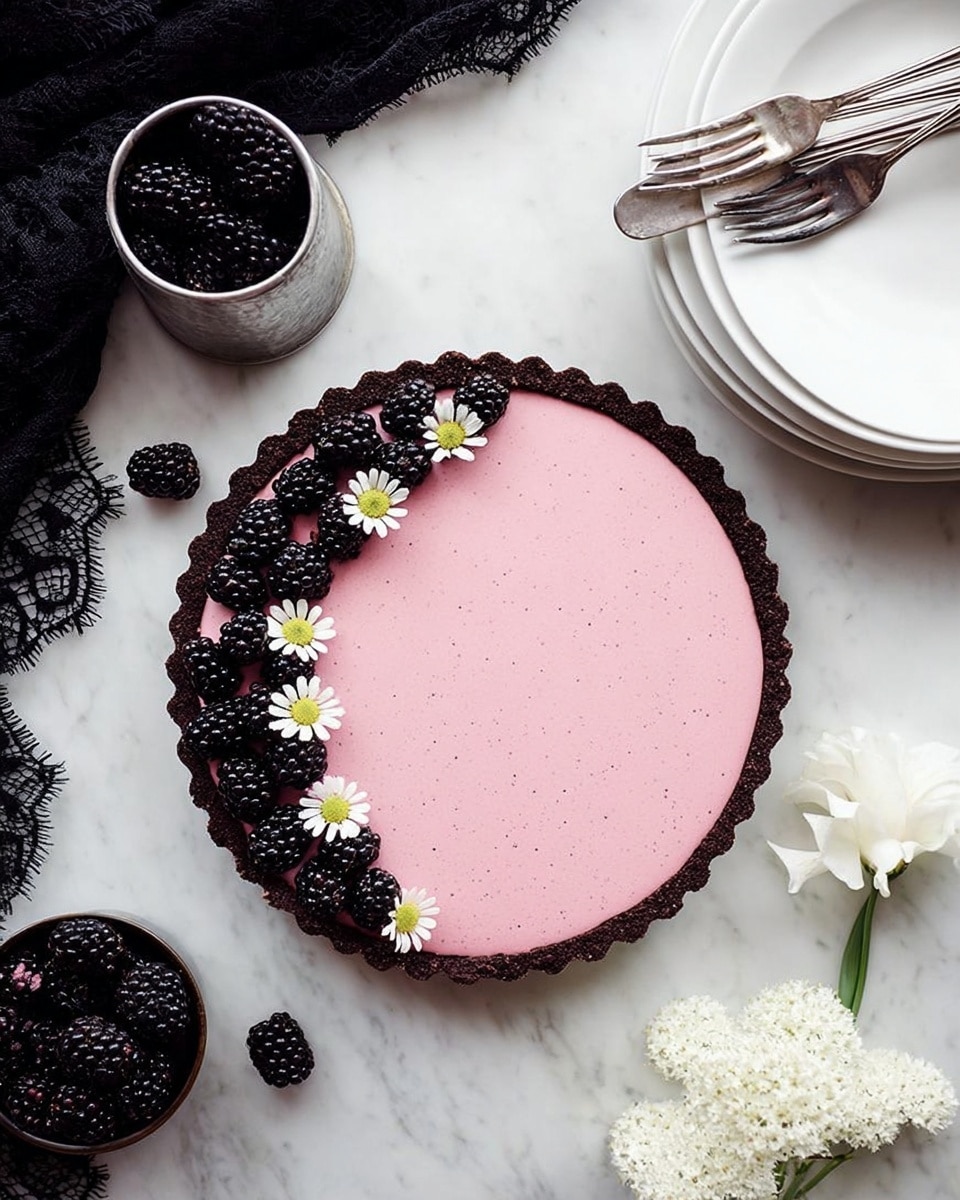
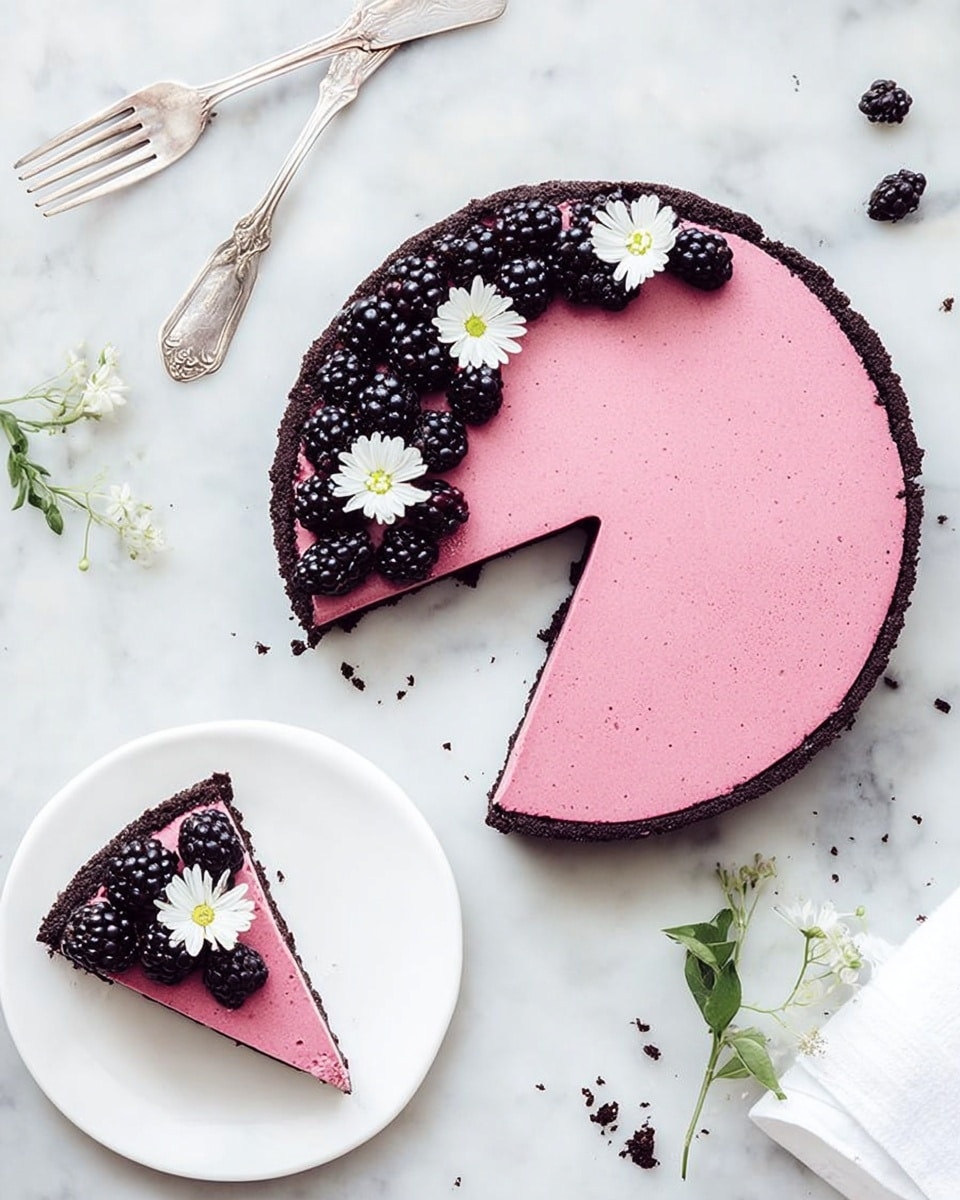
This No Bake Blackberry Tart is a delightful and refreshing dessert that combines a crunchy Oreo crust with a creamy, fruity filling. Perfect for warm days or whenever you want an easy yet impressive treat, it requires no oven time and wows with fresh blackberry flavor.
Ingredients
- 25 Oreo Cookies
- 5 Tbsp unsalted butter (melted)
- 12 ounces fresh blackberries
- 1/2 cup granulated sugar
- 1 Tbsp powdered gelatin (unflavored)
- 8 ounces full fat cream cheese
- 2 tsp vanilla extract (pure)
- 1 cup heavy whipping cream
- 1/2 cup fresh blackberries (optional, for garnish)
Instructions
- Step 1: Coat a 9-inch tart pan with nonstick cooking spray and set aside.
- Step 2: Pulse Oreo cookies, including filling, in a food processor until fine crumbs form, about 1.5 cups.
- Step 3: Add melted butter to the Oreo crumbs and pulse until evenly moistened.
- Step 4: Firmly press the crumb mixture into the base and up the sides of the tart pan using the bottom of a measuring cup.
- Step 5: Place the crust in the freezer to chill while preparing the blackberry filling.
- Step 6: Puree 12 ounces of fresh blackberries in a blender until smooth.
- Step 7: Add granulated sugar, powdered gelatin, cream cheese, and vanilla extract to the blackberry puree and blend on high until well combined. Set aside.
- Step 8: In a separate bowl, beat heavy whipping cream with an electric mixer until stiff peaks form.
- Step 9: Fold the blackberry mixture into the whipped cream gently with a rubber spatula. If lumps remain, whisk briefly by hand until smooth.
- Step 10: Remove the crust from the freezer and pour the filling into it, smoothing the top with an offset spatula.
- Step 11: Refrigerate the tart for a few hours to set, then cover with plastic wrap and refrigerate overnight for best results.
- Step 12: When ready, gently remove the tart pan rim, slice, and serve. Garnish with fresh blackberries if desired.
Tips & Variations
- For a firmer filling, chill the tart longer or add an extra 1/2 teaspoon of gelatin.
- Try substituting blackberries with raspberries or blueberries for a different berry flavor.
- If you don’t have a food processor, place Oreos in a sealed bag and crush with a rolling pin.
- Use low-fat cream cheese for a lighter tart, though texture will be less creamy.
Storage
Store the tart covered in the refrigerator for up to 5 days. To reheat, allow it to come to room temperature for about 15 minutes; this tart is best served chilled and does not require warming.
How to Serve
Serve this delicious recipe with your favorite sides.
FAQs
Can I use frozen blackberries instead of fresh?
Yes, you can use frozen blackberries. Thaw them fully and drain any excess liquid before pureeing to avoid a watery filling.
Is it necessary to use gelatin?
Gelatin helps the filling set firmly since this tart is no-bake. Without gelatin, the filling may be too soft and not hold its shape well.
PrintNo Bake Blackberry Tart Recipe

This no-bake blackberry tart features a crunchy Oreo cookie crust with a creamy, smooth blackberry cream cheese filling. Perfect for a refreshing dessert, it requires no oven and is set by chilling overnight, making it an easy yet impressive treat for any occasion.
- Prep Time: 20 minutes
- Cook Time: 0 minutes
- Total Time: 4 hours 20 minutes (including chilling time; best if refrigerated overnight)
- Yield: 8 servings 1x
- Category: Dessert
- Method: No-Cook
- Cuisine: American
Ingredients
Crust
- 25 Oreo Cookies
- 5 Tbsp unsalted butter (melted)
Filling
- 12 ounces fresh blackberries
- 1/2 cup granulated sugar
- 1 Tbsp powdered gelatin (unflavored)
- 8 ounces full fat cream cheese
- 2 tsp vanilla extract (pure)
- 1 cup heavy whipping cream
- 1/2 cup fresh blackberries (optional, for garnish)
Instructions
- Prepare the tart pan: Coat a 9-inch tart pan with nonstick cooking spray and set it aside.
- Make the Oreo crust: Pulse the Oreo cookies, including the filling, in a food processor until fine crumbs form, yielding approximately 1.5 cups of crumbs. Add melted butter to the crumbs and pulse until evenly moistened.
- Form the crust: Firmly press the Oreo crumb mixture into the bottom and up the sides of the tart pan using the bottom of a clean measuring cup to ensure even compaction.
- Chill the crust: Place the tart pan in the freezer to chill and set while preparing the filling.
- Puree blackberries: In a blender, puree 12 ounces of fresh blackberries until smooth.
- Combine filling ingredients: Add granulated sugar, powdered gelatin, cream cheese, and vanilla extract to the blackberry puree and blend on high until the mixture is well combined. Set aside.
- Whip cream: In a separate bowl, beat heavy whipping cream with an electric mixer until stiff peaks form.
- Fold filling: Gently fold the blackberry mixture into the whipped cream using a rubber spatula until fully combined. If the mixture is lumpy, whisk quickly by hand until smooth.
- Assemble tart: Remove the Oreo crust from the freezer. Pour the blackberry filling into the crust and smooth the top with an offset spatula.
- Refrigerate the tart: Cover the tart loosely with plastic wrap and refrigerate for a few hours until set, then refrigerate overnight for best results.
- Serve: Carefully remove the rim from the tart pan, slice the tart, and garnish with additional fresh blackberries if desired.
- Store leftovers: Cover any leftover tart and store it in the refrigerator for up to 5 days.
Notes
- Ensure the cream cheese is softened before blending for a smoother filling.
- If gelatin lumps appear, heat the mixture gently to dissolve or use cold water to bloom the gelatin before adding.
- For a firmer tart, chill overnight to allow the gelatin to set completely.
- Use fresh blackberries for the best flavor and texture.
- Substitute Oreo cookies with gluten-free sandwich cookies if a gluten-free crust is desired.
Keywords: No bake tart, blackberry dessert, Oreo crust, cream cheese filling, easy dessert, summer tart, no oven dessert